02 July, 2011

DIY: Lens trial and error

"Learning by trial and error" was a leitmotif from my dad. And this post is about trial and error.

I've found in the december 2009 issue of the German fotoMAGAZIN a DIY-tutorial, where they adapt the lens with bellows of an old Adox Golf to a DSLR.
Okay, I didn't want to slaughter my Zeiss Ikon Nettar 518/16, but I searched in my camera trash box and found:
- the old and broken bellows of my ICA
- the lens part of a slaughtered Revuenon Special 2.8/35mm
- the M42 mounting thread of an old Domiplan

The ICA bellows had many holes, which I've patched with black sponge rubber. I've used plywood to connect the bellows wit the M42 mounting thread. I've attached the lens part of the Revuenon Special in the reverse position at the bellows.


Yes, it looks like a monster, but it doesn't works. Okay, I didn't make the hole in the center of the plywood and the bellows patch is a fuck...Learning by trial and error!!!

After that I've removed the M42 mounting thread and searched in the camera trash box once more. I've found the old lens part of the AutoYashinon DS-M 1.7/50mm and attached it (with Loctite) in the reverse position at the mounting thread. Then I've glued black sponge rubber like a lens hood on the whole thing.


And yes this crazy lens works. It is a monster-macro!
And here're some pictures made with the lens!

01 July, 2011

"Finding the right subject...

...is the hardest part."

Mary Ellen Mark

"it stops dead in its tracks", brasil, 2011

The world peace with an old Kodak-lens!

Finally, there are photos by the Kodak-Helios lens! It really took a long time. First I shot two rolls of film at the MAB. But I totally underexposed both rolls. After this I made some test photos in my garden and I changed the camera, at the MAB I used the Porst FX4 (Praktica Nova 1B), but then I used the Praktica LTL3.
And finally I got the correct exposure. Even if you stop down the lens, the depth of field is very slight. But this is logical, 'cause enlarger lenses aren't made for this.

1/500 - 5.6:

1/125 - 11:

1/30 - 22:


1/125 - 22
and in combination with a flash gun @45º + bounce card:


more pictures here.

and part 2!

26 June, 2011

DIY: Enlarger lens on SLR - part 2

After the Kodak Helios lens, I've built now a new combination out of an enlarging lens and an old M42 lens.
The enlarging lens is the Schneider Kreuznach Componon 5.6/80mm and the M42 lens is the Exaktar SFX 35.

Once again I slaughtered one of mine M42 lens, but the Exaktar SFX 35 was really very difficult to use. It was very easy to combine the two lenses.


Here're some pictures made with the lens!

Here is a good DIY-instruction to adapt an enlarging lens on a SLR.

23 June, 2011

"Sou fascinada pelos momentos de transição,...

...em que as pessoas ficam paralisadas, sem saber o que querem fazer, e precisam escolher o caminho, um rumo que pode redefinir tudo."

Sofia Coppola


"momentos de transição 01-10", brasil, 2011

21 June, 2011

"If you're not interested in life,...

...then photography has no meaning."

Ruth Bernhard

"scrape the sky", germany/brasil, 2005/2011

19 June, 2011

"The hardest thing about being a photographer is,...

...you have to take pictures."

Doug Bartlow

"two angry dogs", brasil, 2010

"For me, photography has become a way...

...of attempting to make sense of the very strange world that I see around me. I don't ever expect to achieve that understanding, but the fact that I am trying comforts me."

Mikhael Subotzky

"bull dozer", brasil, 2010

Pictorialism for idiots - part 2

Yes, I know you're a little disappointed about the first part of Pictorialism for idiots!
Because actually that wasn't very necessarily correct and the photos didn't look like the Pictorialism style.
But give me one more chance, please.

Okay, thanks!
I had already edited one of the photos with Photoshop, the colors and the curves, but just a little bit:

Now I'll create a sandwich with this photo and a layer, which I've just used to edit these pictures. The layer is actually an old blotting paper, which I scanned:

You can use many things as layer, for example photos of structures, different types of paper, etc., follow your creativity, but please NOT USE MY LAYER! ;)
Of course you must try as it works best, for example modify the opacity, change the layer settings (normal, multiply, overlay, etc.), color or b/w etc.

At the end it could look like this:

Still not really the Pictorialism style?

18 June, 2011

DIY: Flash Bouncer / Diffusor

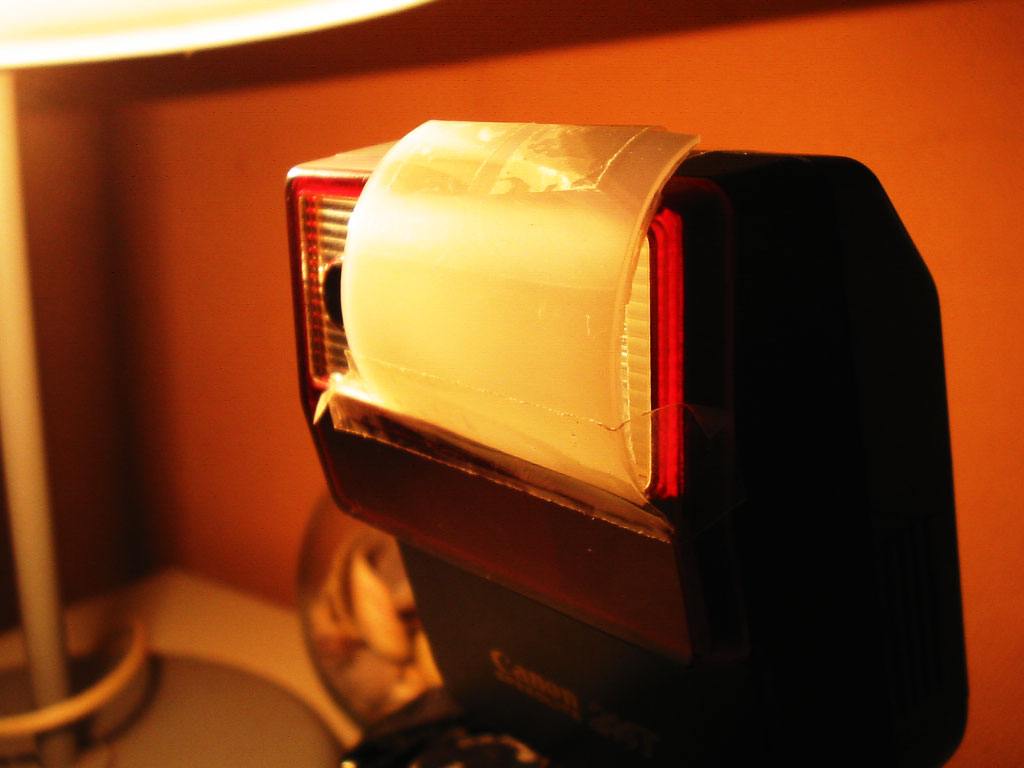
The light of a flash is very hard, therefore many firms make wonderful flash-equipment like bouncer, diffusor, etc. for their flashes. But it's going to cost whatever it costs.


For everything there is a DIY-instruction, like these for a bouncer and for a diffusor.
So why should we spend money for it?

1. just paper (and
scotch tape to fix the paper):


2. 2-in-1 bounce card (one side: white paper / other side: kitchenfoil):


3. transparent plastic (from a Fuji-35mm-filmbox):